Sami is back! After having the pleasure of being the first photographer to ever work with Sami last year, she returned to my camera for another photo session. In this post I’ll walk you through how I select, edit, and retouch images from a photo shoot in Adobe Lightroom Classic CC and Adobe Photoshop CC 2018.

Lightroom Workflow: culling and selection
After importing the images into Lightroom (where I do nothing special to them aside from adding metadata), I first make broad selections of the best photos from the photo shoot. I do this with Lightroom’s flag status, marking my selections as “picks”. Typically a photo shoot with 300-500 images can be narrowed down to around 60-70 after the first pass. After this I’ll do a second pass, where I rate the images using Lightoom’s star rating system (1-5 stars). All of the 5-star images are the ones I end up retouching. Typically I’ll end up with anywhere from 10-30 images marked as 5-stars. Lightroom additionally has the ability to mark images with colour codes, so it’s easy for any photographer to find a system that works for them.
This second pass affords me the ability to examine a narrower selection of images in more detail. During my initial pass, I’ll often pick two nearly identical images and then compare them during the second pass. There might be slight differences in pose, expression, or especially focus that will help me decide which photo is better.


Lightroom Workflow: colour, contrast, and exposure
This stage is where the majority of my work is done. As a photographer, I’ve never had a super distinct style (like, say, the sepia tones of Herb Ritts, the direct-flash of Juergen Teller, or the pink-and-teal tones of Brandon Woelfel). So for me, editing images is not as easy or as lazy as just applying a single preset to every image. That being said, I have a great many Lightroom presets at my disposal that I use in varying combinations to achieve the look I want.
Some time ago I discovered the NATE CAM Starter Pack presets by Nate Photographic, which are Lightroom-specific versions of VSCO’s most popular filters. I’ve since used the A4, A5, A6, and HB1 presets as a starting point for many of my own recent images. While I don’t think cool tones in general are good for portraiture, the cool tones in some of these presets are subtle and mostly in the shadows, which I do enjoy.
If I’m starting with one of these presets or my own homemade variations, I don’t do anything special in Lightroom aside from tweaking the sliders. Typically I don’t often use gradients, radial filters, or brushes in Lightroom except when absolutely necessary. I do appreciate a gradient’s ability to help balance a lopsided scene by selectively brightening or darkening certain areas. Likewise, if I want to give the face in an image a slight exposure boost, the radial filter comes in handy. But I don’t use them often.
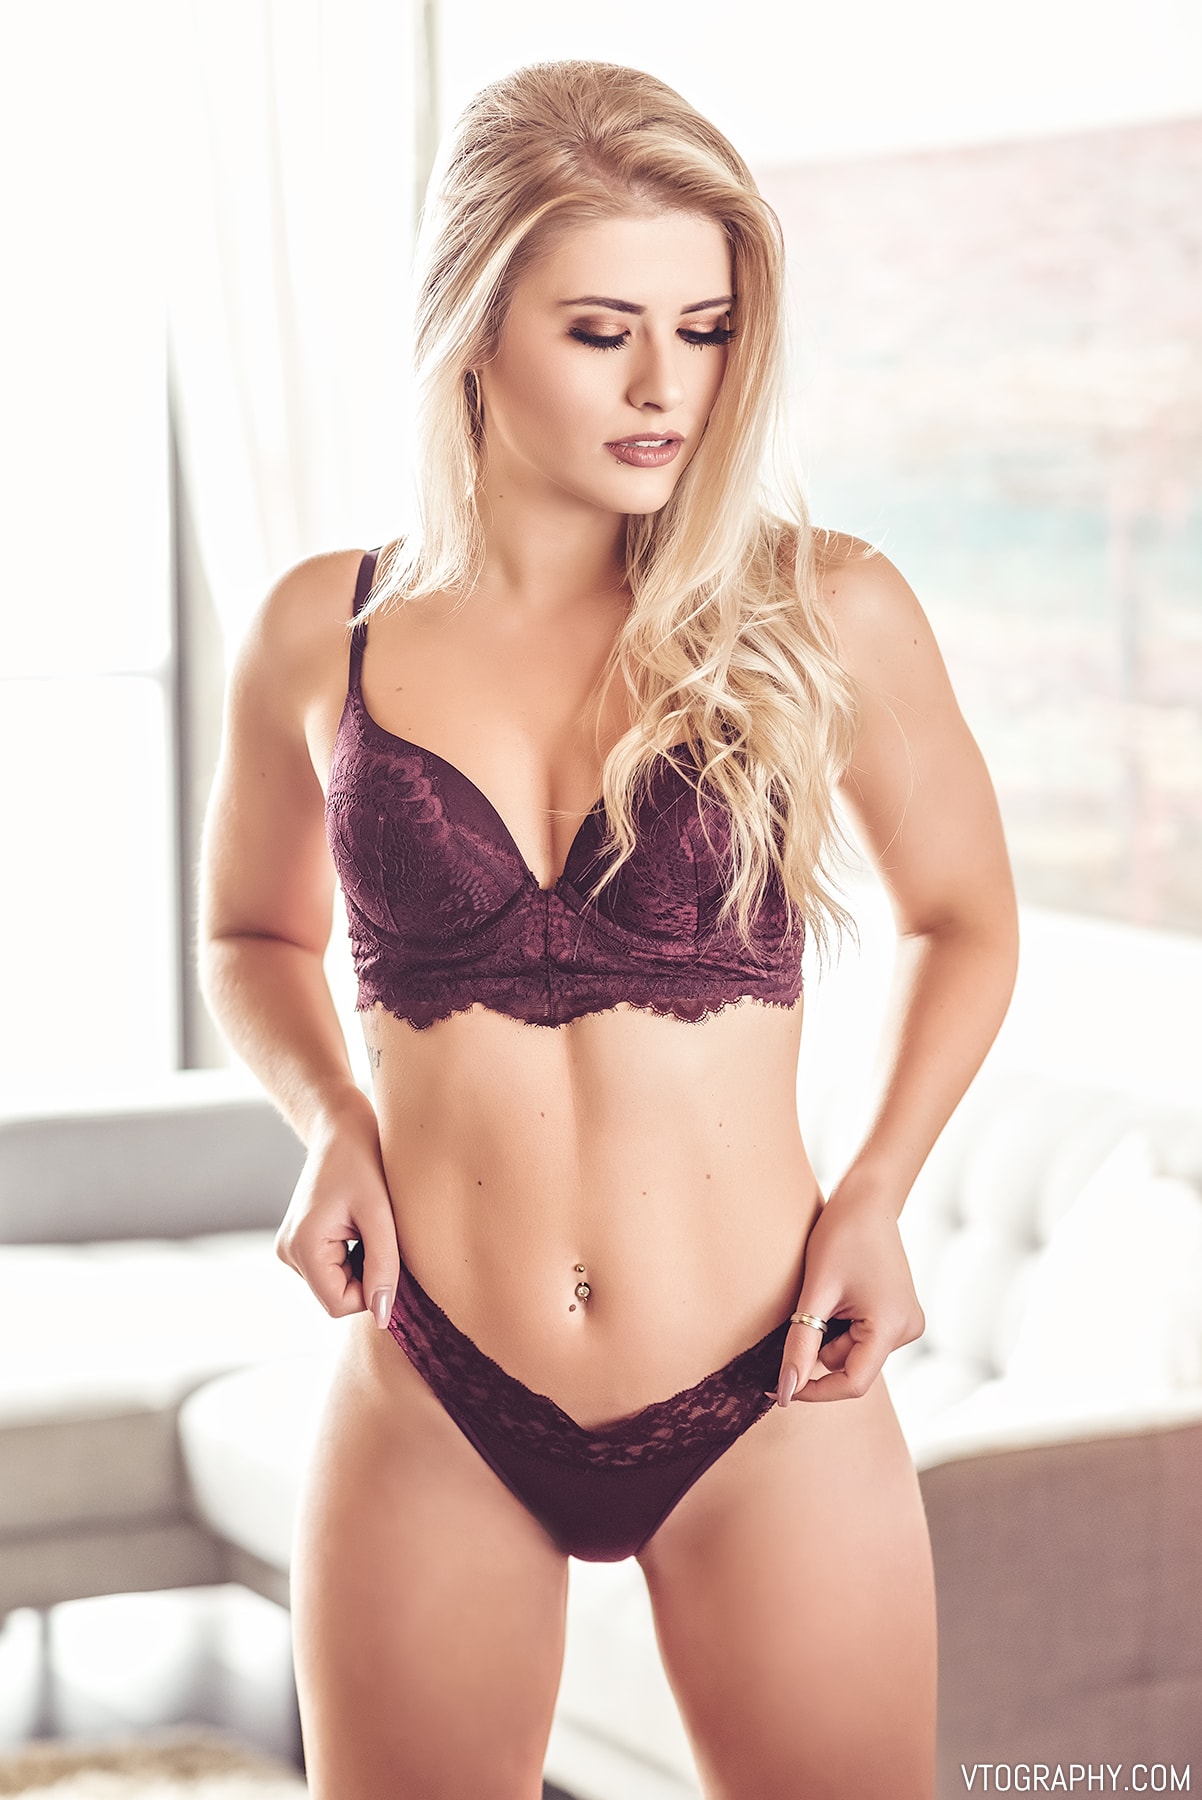
These images of Sami below were started with the HB1 preset from the NATE CAM Starter Pack, before adding my own tweaks, additions, and adjustments. In case you can’t tell, Sami has been squatting like crazy since our last photo shoot. She’s also debuting her natural eyes here instead of coloured contact lenses, and I much prefer the natural look! What do you think?


Lightroom Workflow: other stuff
My sharpening and noise reduction choices vary by image, depending on the content. Noise Reduction is dependent entirely on what ISO I’m shooting at. For natural light images at low light and high ISO, I usually keep Noise Reduction at 30 or under. Images photographed at ISO 100 typically don’t need any NR at all. I keep Sharpening at some fairly conservative settings, adjusting only the main slider up to about the 70-90 range and leaving other values at their defaults.
I always switch on Lightroom’s options for lens corrections, whether it looks like they’re needed or not. I figure it’s better to work with a technically “correct” image whenever possible. Depending on which lens was used, this usually corrects a very minor amount of distortion and vignetting. The differences are subtle.
To focus attention more on the subject in the centre of the frame, I’ll often add some vignetting (at a value of 10-15 or so), but usually not with images that are backlit or feature very white or light areas at the edges of the frame. Adding a vignette to these images can make the white areas look a bit dull and muddy. The images below do not have any vignette applied since they feature bright edges.


Photoshop Workflow: skin retouching
Once I’ve finished my corrections in Lightroom, I’ll move the files in to Photoshop as 16-bit, ProPhoto RGB, PSD images for skin retouching. 90% of the work was already done in Lightroom, so the remaining 10% is just making the skin look great. My primary tool for this is Imagenomic Portraiture, which makes selection of skin and smoothing of skin a breeze. It’s not quite as effective as frequency separation, but it’s much quicker.
Along with skin retouching, I’ll also apply some light liquifying where needed (usually to accentuate existing shapes and curves), cleanup any stray hairs, use the healing brush on blemishes, and some dodging and burning.
Photoshop Workflow: watermarking, resizing, exporting
The final stage is preparing the images for their final destinations — usually Instagram and this blog. First, I resize the images to 1080px wide for Instagram and 1800px on the long edge for this blog. This can be tricky as Instagram forces a 4:5 ratio for vertical images, so the common 2:3 ratio images created by a DSLR will be cropped if uploaded to Instagram without modification. So I either crop myself if the image allows, or I use Photoshop’s Content Aware features to scale the background to the new ratio.
Although 1800px on the long edge is the standard size I use here on the blog, I also create three more resized versions of whatever I choose as the “feature” image. This is the image that I choose to represent the blog post here on the blog and when the link is shared on social media:
- 1200x630px for Facebook shares
- 1024x512px for Twitter shares
- 1200x900px for WordPress featured post
For each version created, I’ll use Nik Sharpener to make them look optimal for on-screen viewing. Lastly, I export using “Save For Web” and then run the files through ImageOptim to get the best quality file at the smallest possible size. ImageOptim is amazing and has way better algorithms than any Adobe product for reducing file sizes — especially important when it comes to page loading times.
After all the images are complete, I send the images to the model via a private Dropbox link.


Archive and storage
The final step is to move all the original raw files, retouched final images, and Lightroom Catalog from my “Working” SSD drive to permanent storage. An old Drobo S unit serves as my primary storage RAID, and another Drobo 4-bay backs it up every single night. Redundancy is key! I’m still lacking an online backup solution, and I shudder to think how long it will take to upload 10+ years of files, even with my Gigabit fibre connection.
Shop for the gear I used for this photo shoot
- Nikon D750 FX DSLR Camera Body with Meike MK-DR750 Battery Grip
- Nikon 50mm FX ƒ/1.4G AF-S Lens and Nikon 85mm FX ƒ/1.8G AF-S Lens were each used depending on how much working space I had in front and behind me
- 36”x48” 5-in-1 Reflector was used to bounce light on to Sami’s front, as my main lights were always placed behind her
- Manfrotto 1004BAC Light Stands
- Paul C. Buff Einstein Monolight for the bedroom photos
- Neewer Reflector Holder
- Sami’s burgundy lingerie is from La Senza, her blue CK set from Calvin Klein, and the “Trouble” ringer tee-shirt is from Forever 21. Sami has called dibs on being my first beach model of 2018, so you can look forward to that.
Please, if you value this site, I’d appreciate your support by starting your Amazon shopping by clicking on any of the Amazon links on this site, such as the ones above. Thanks!